First serious off-road

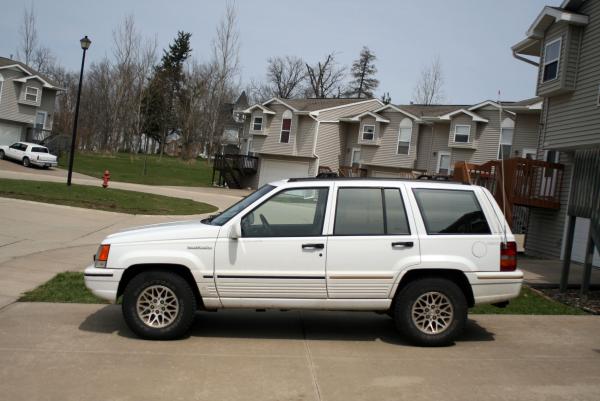
On Saturday I did my first serious off-road. I went to Hannibal Rocks off-road park to test my new 3″ lift I put on earlier last week. Results? I am very disappointed. I mean the lift, the whole suspension performed very well. Just my tires weren’t able to keep up with it and I got stuck two times in fairly easy (you would say) terrain.

First it was step climb. Here is the picture before:

mudhole1.JPG

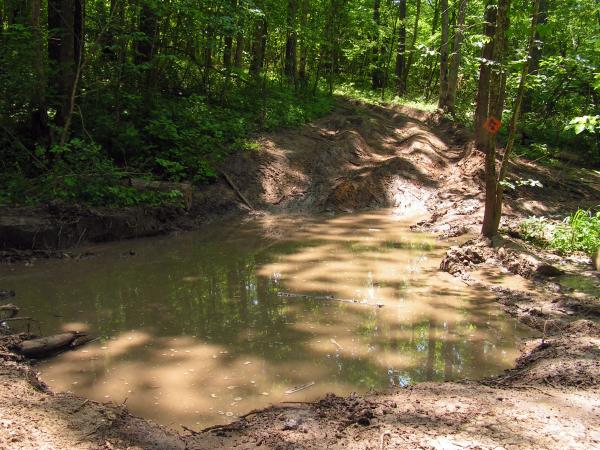
It starts just after this mud puddle. Normally there would be no problem in going up, but my tires got filled up with mud in the puddle and they became very slick. The results?

stuck1.JPG

The car went not the way I wanted it to, but slipped with it’s rear tires right into ruts pulling whole car towards the tree.

stuck2.JPG

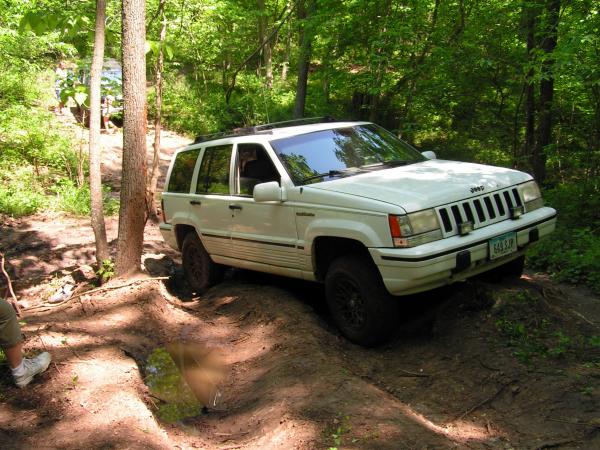
Although it doesn’t look that bad there were moments I was closer than inch from this tree. So after 3 tries I decided to back up and try another route.

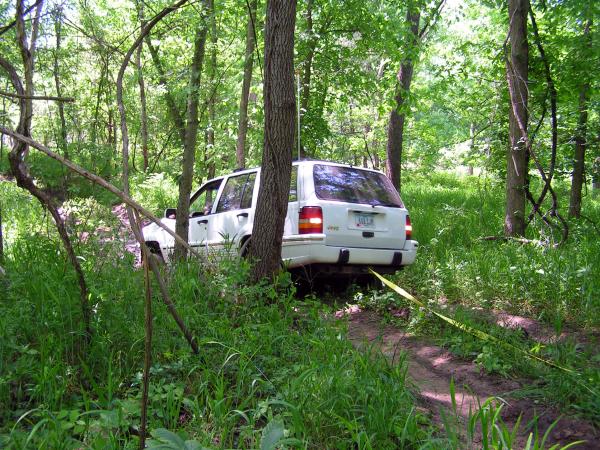
Then there was muddy trail in which I just couldn’t move anymore – I got high centered – all wheels were spinning with no move at all.

stuck3.JPG

Conclusions? I desperately need to buy new tires.

CB antenna mount in Grand Cherokee

Ever thought about some nice looking CB antenna mount for your Jeep ZJ? Instead of fabricating some brackets, mounts etc. go to any website selling Firestick’s products and pick up the MK204R kit. I picked up mine at Walcott CB for less than $30 and considering there is cable in the kit looks like quite cheap thing.

Now to the mounting part. I decided to put mine around rear left tail lamp. The thing is that I wanted it to be as less obstructive for tailgate and lights as it’s possible. Here is a picture how I manage to achieve that goal:

mount0.jpg

mount1.JPG

I used 4 self taping screws to securely bolt it to the body. Also the rotating part of the mount was bolted upside down – it will allow to put some heavy duty spring and quick mount and it still won’t be looking like R/C model with 5ft antenna I’m going to install.

Here you can see how I routed the cable

mount2.JPG

I used existing hole in the body, so I limited amount of drilling to zero.

Another nice thing is that tail lamp if firmly fitting in it’s place now holding the mount in it’s place and keeping it from swinging around on heavy wind.

Final efect

final1.JPG

final2.JPG

with 5 ft stick went over my best expectations. Now my Grand Cherokee looks clean and nice, almost like factory equipped with this.

Technorati Tags: , , , ,

Kevin’s radiator support in my ZJ

As our plans for going to Jeep Jamboree this year start to look more promising I started to prepare our ZJ to this (I hope) demanding task. First things first – we need some recovery gear. So I ordered strong radiator support form Kevin’s Off Road Below is small howto.

Unscrew 3 bolts keeping grill in place and take it out:
grill.JPG

Remove plastic pins on both ends of bumper cover:
rivets3.jpg

Then remove 3 bolts on the bottom:
rivets2.jpg

and 3 pins on the top:
rivets.jpg

At this moment you can take it carefully out and put away to not damage it during the rest of the process.

Now remove three bolts on each side of oem radiator support (15mm socket):
oldbolts.JPG
and take it away.

Before putting new support on check if radiator’s positioning pins are short enough to fully hide in new support and trim old rubber stoppers:
rubber_stoppers.jpg

Now it gets a little tricky because you have to lift and keep new support in place while putting bolts in factory mounting wholes. Having help is good, but it wasn’t that heavy so I managed to do it by myself. Remember about putting trimmed rubber washers between radiator and support:
stoper.jpg

Now when all four lower bolts are in place it’s time to put side bolts in. Use existing holes:
mounted.jpg

Insert small plates through openings in front of frame rails and bolt them on:
inside_plate.jpg

Now funny part begins – carefully put the bumper cover and look where mount (and tow straps attached to them) will interfere with it. Mark it with pencil, take the cover off and carefully trim it. I did something like that:
fascia_trimmed.jpg

You have to be really careful to notice that it’s not factory shape (especially after I painted trimmed areas white).

Using first part of this howto put the bumper cover back on, insert three top pins and 6 side ones. Mount grill, open beer and enjoy your work.

Technorati Tags: , ,

NP249J to NP242 swap in ZJ

Done yesterday. It took less than 4h (total – even with changing information center’s connections). Probably because it was direct swap. When I was looking for replacement I clearly stated that I need a NP242J from Grand Cherokee with 42RE transmission. Thanks to that everything worked like a charm.

First impressions very positive – the car is more quiet, mileage went up about 3mpg in 2WD and last but the most important – due to locked visco it was impossible to do almost any maneuvers on the concrete parking lot – now it works. I hope it will save me huge amount of bucks on front differential replacement.

Technorati Tags: , ,

Rheem furnace repair

Last fall while replacing our water heater the technician made a quick look and said that our furnace is going to need some attention in the near future because of cracked igniter. It was still working then but he said it may need replacement any time. Of course I didn’t think about it much then but, as Mr. Murphy says, things always go wrong when you least expect them. So our furnace decided to start dying when we needed to reheat our house after last week ice storm power blackout. This time I didn’t wait long and ordered needed parts from Arnold Service. As quick as small business can be – they were sent immediately and arrived in two days.

Below you can see “before” state – flame sensor on the left and igniter on the right.

before-flame-sensor.jpg   before-igniter.jpg

It’s not that hard to see that igniter is not looking ok, although it’s much harder to recognize that flame sensor is not good either – it’s loose and not always correctly sensing flame which results in unnecessary furnace cycling.

The hole operation was quick and easy. First I replaced the flame sensor – disconnect one cable and unbolt one screw (both visible on above photo). When I took it out I could see that the ceramic holder is cracked and the sensor’s rod is free to move about 60 degrees resulting in incorrect readings.

pict3773.JPG   pict3776.JPG

A little harder task was waiting for me in with the igniter – first I had to disconnect the odd plastic connector, then two bolts.

pict3771.JPG

After that I had to transfer metal bracket to the new one and carefully place it there without cracking the new one hitting other parts of furnace. It took me… well 30 seconds?

Below new and old one together and the new one installed in the furnace.

pict3779.JPG   pict3780.JPG

Some additional cleaning and our furnace works like new.

Technorati Tags: , , , ,